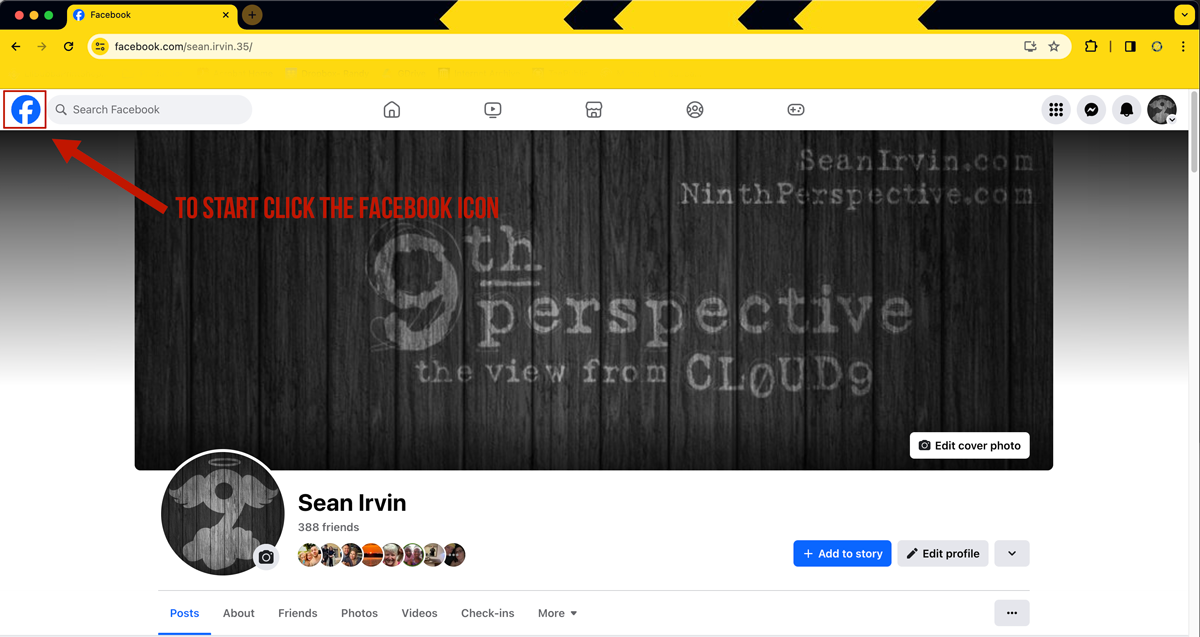
To create a Facebook Business Page you will have to use your personal page to start. Make sure you are logged in before beginning this tutorial. Once you are logged in to your personal account
(Image 1), go to the top left corner and click the Facebook Icon to reveal the next page
(Image 2).
(Image 1)
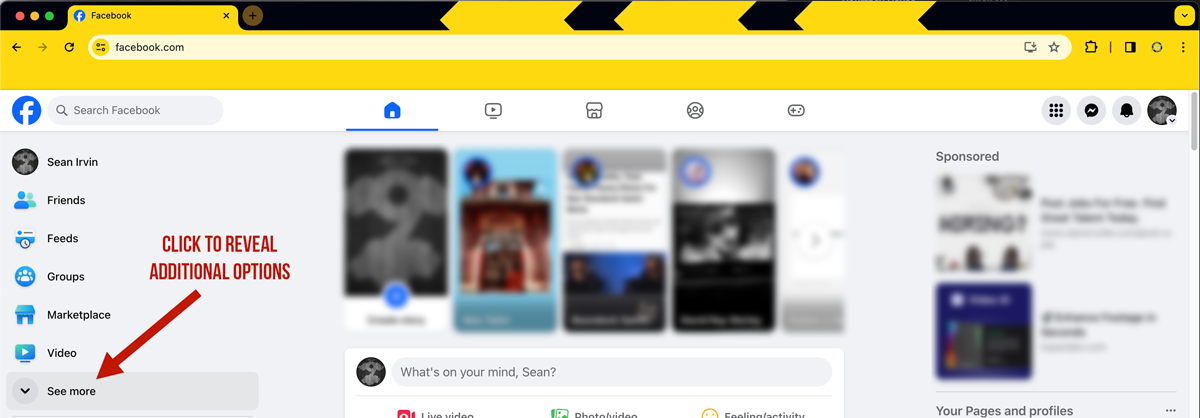
Next you will scroll down to the See more tab. Once there, click the See more button
(Image 2) to reveal a drop-down menu
(Image 3).
(Image 2)
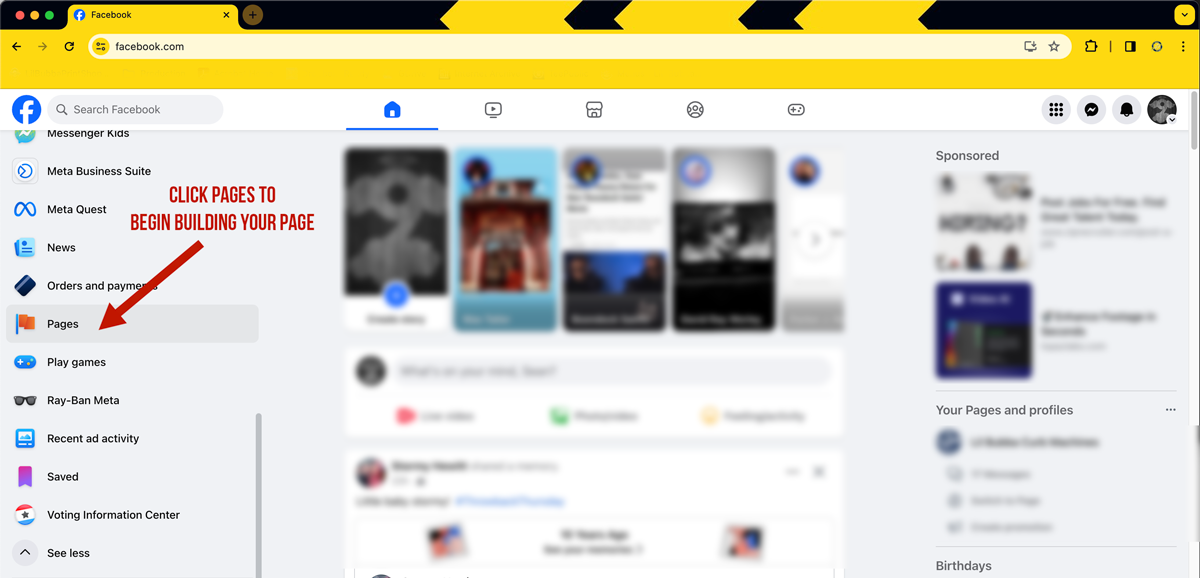
When the menu displays, scroll down until you see the Pages Screen tab. Click the Pages tab
(Image 3) to get into the Page Builder
(Image 4).
(Image 3)
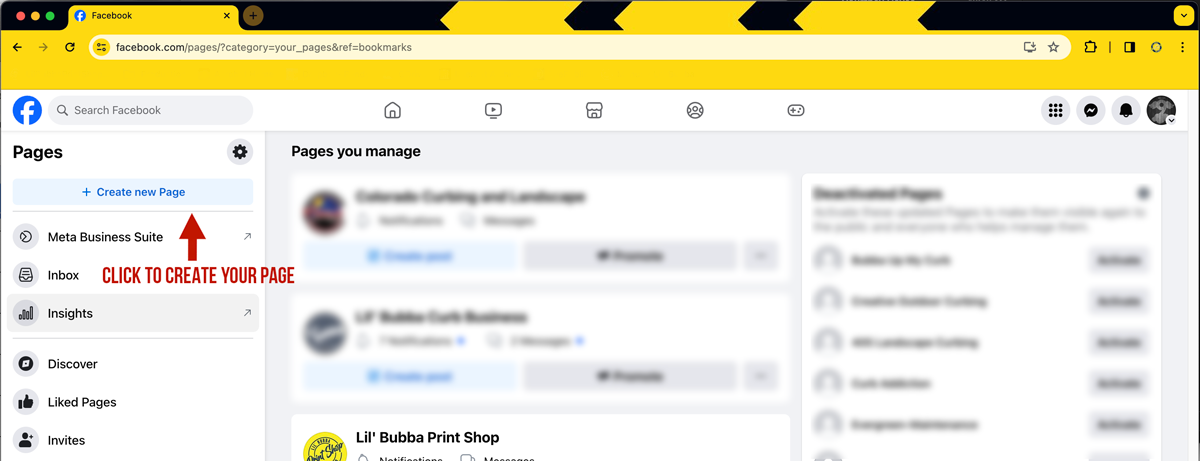
Once the Pages Screen is loaded, you will click the + Create new Page tab. Clicking this tab will load the Page Builder .
(Image 4)
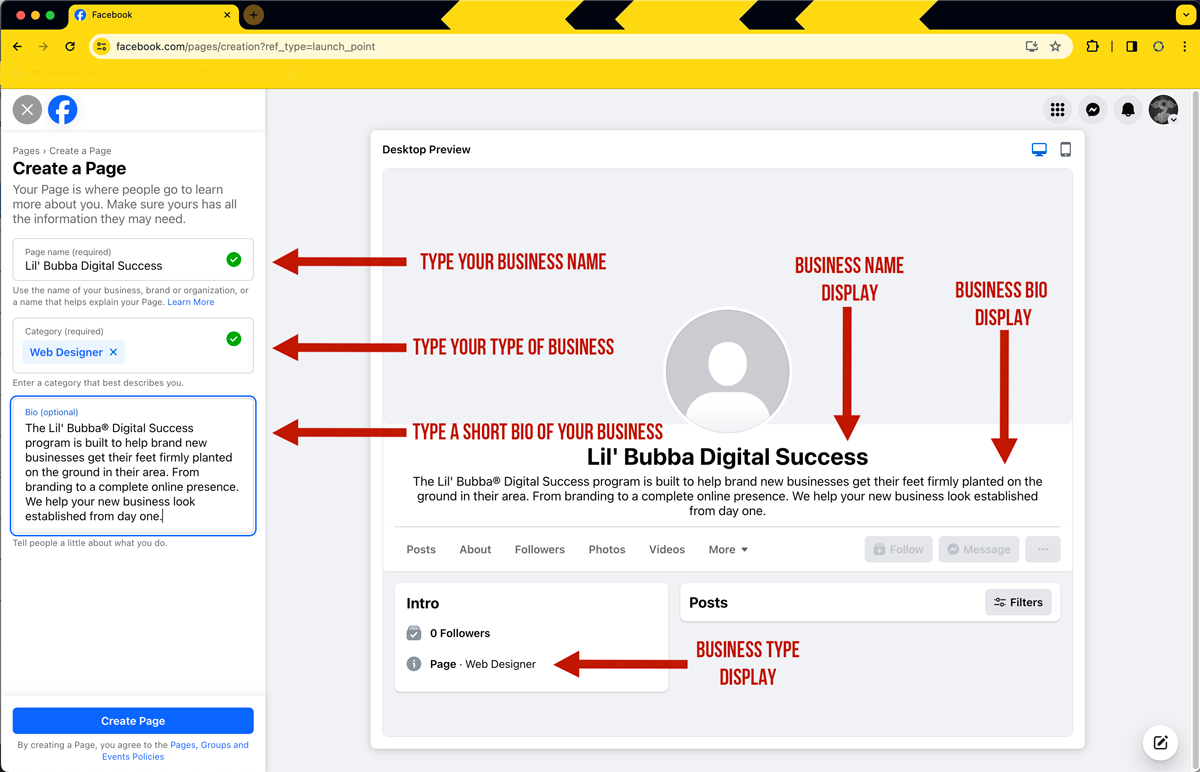
Now you are inside the Page Builder and you will start by entering your business name in the Page Name box, followed by entering the type of business in the Category box and then finally create a short “bio” about your business in the Bio box.
You will notice that as you enter the requested information it is displaying in the Desktop Preview window
(Image 5). After you have entered the requested information click the blue Create Page button to move to the next screen.
(Image 5)
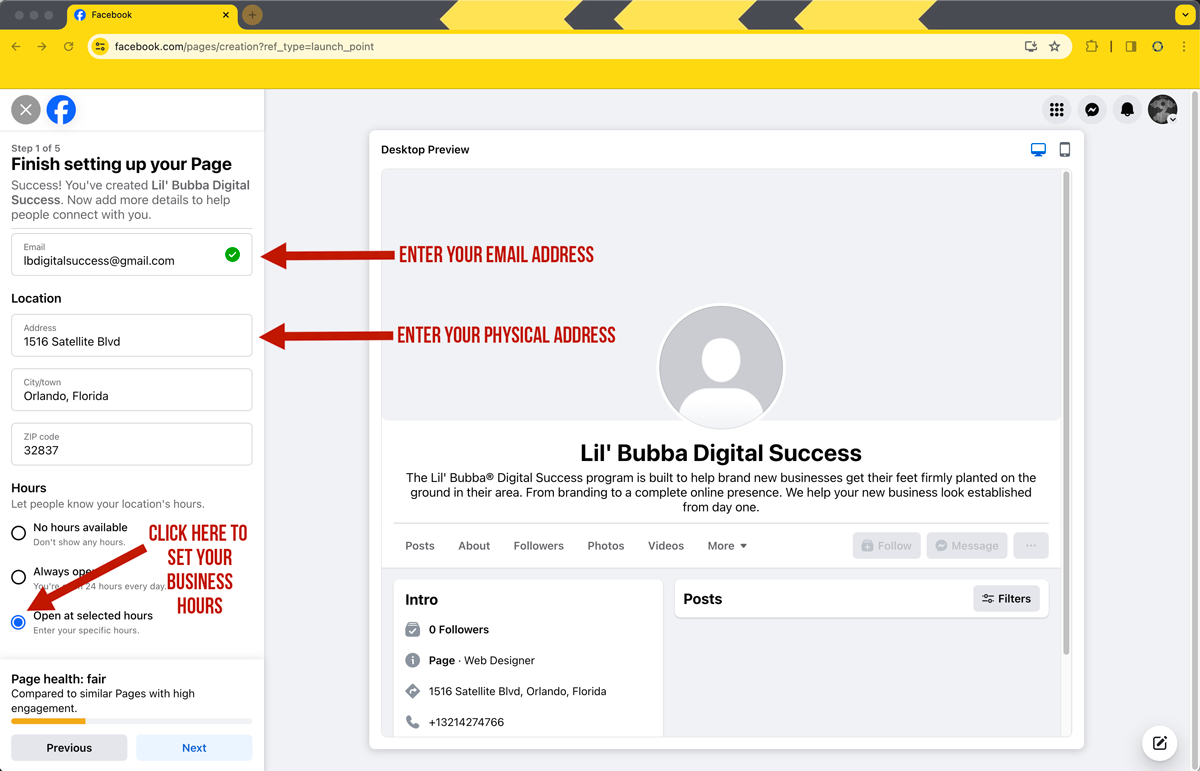
Once the screen loads, you will now continue entering the information about your business. First enter the Email account associated with your business
(Image 6). Next you will enter a physical address for your business. P.O. Box addresses are not accepted by Facebook.
Next you will enter the Hours of Operation you will be keeping with your business.Click the Open at selected hours. button which will prompt a pop-up window that will allow you to enter your business hours. You can change or adjust these hours at anytime, if you choose.
(Image 6)
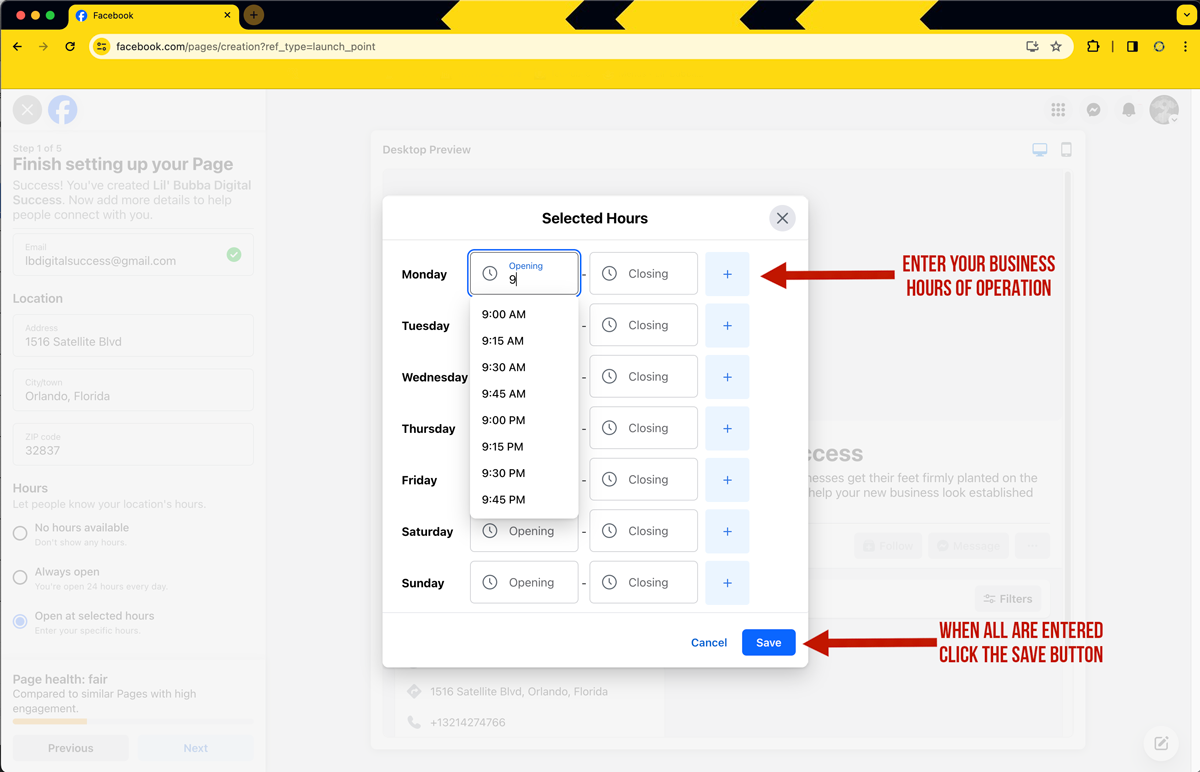
The pop-up window will allow you to enter your open and close times for any day that you choose. After entering all your hours of operation, click the Save button in the bottom right corner
(Image 7).
(Image 7)
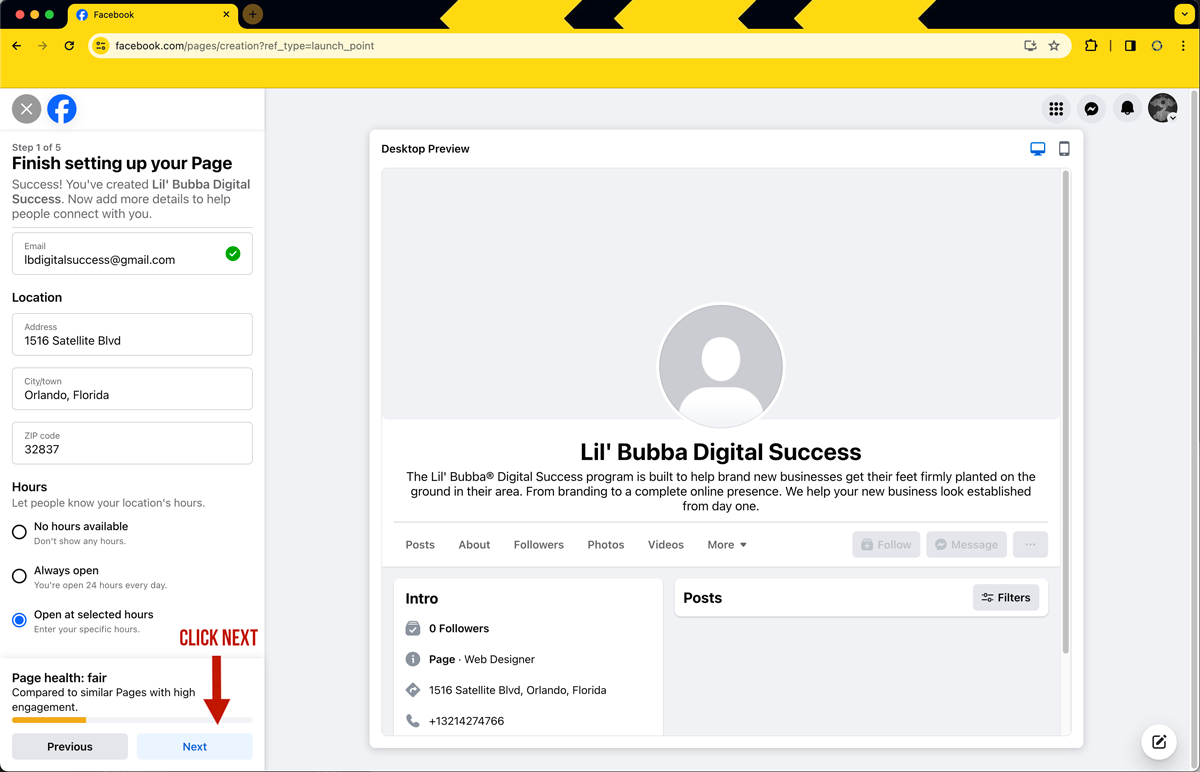
After click the Save button, the pop-up window will disappear revealing the page underneath. When the page is clear go down to the bottom left corner and click the Next button to move to the next page.
(Image 8).
(Image 8)
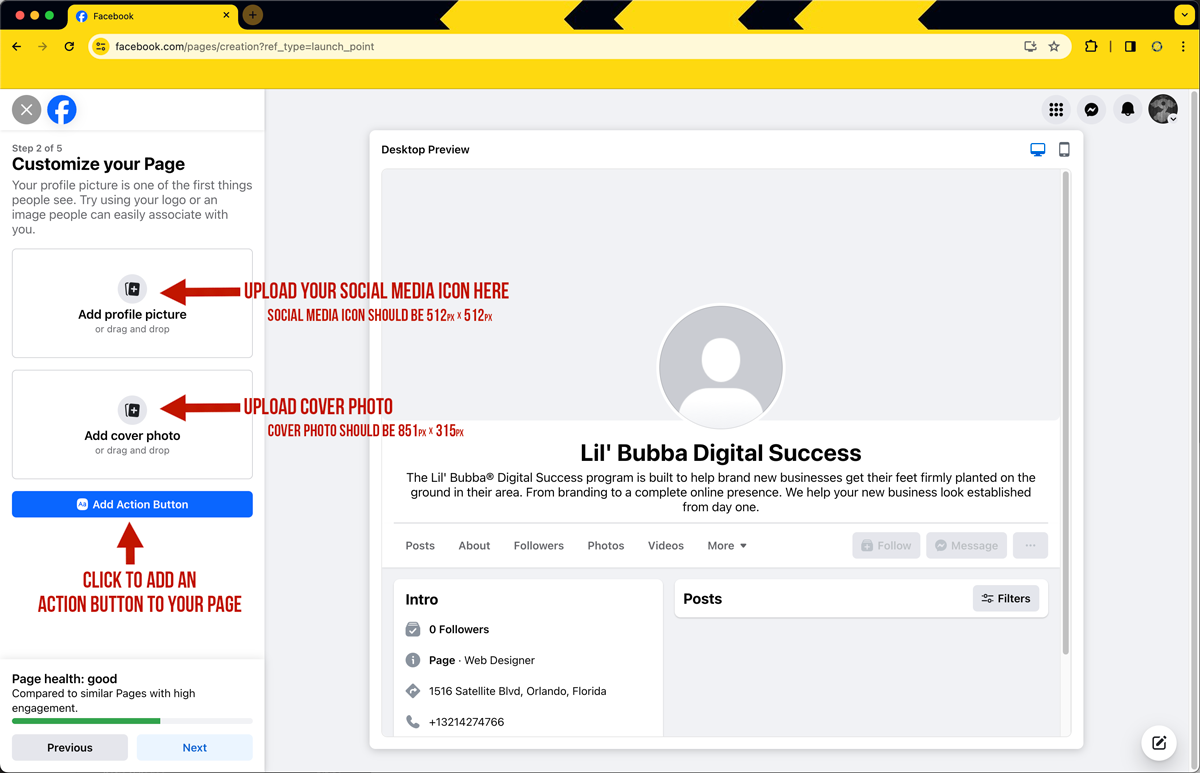
Now we will be dressing the page with your branding. First upload your Social Media Icon in the Add profile piture box. The standard size for Social Media Icons is 512px x 512px (PIXELS).
Next you will load your Facebook Cover Photo in the Add cover photo box. The standard size for Facebook Cover Photos is 851px x 315px (PIXELS). After you have loaded both images, you can now create an Action Button which can allow potential customers to call your business with the click of a button on your Facebook Business page.
To create the Action Button, click the Add Action Button in the left of the screen.
(Image 9).
(Image 9)
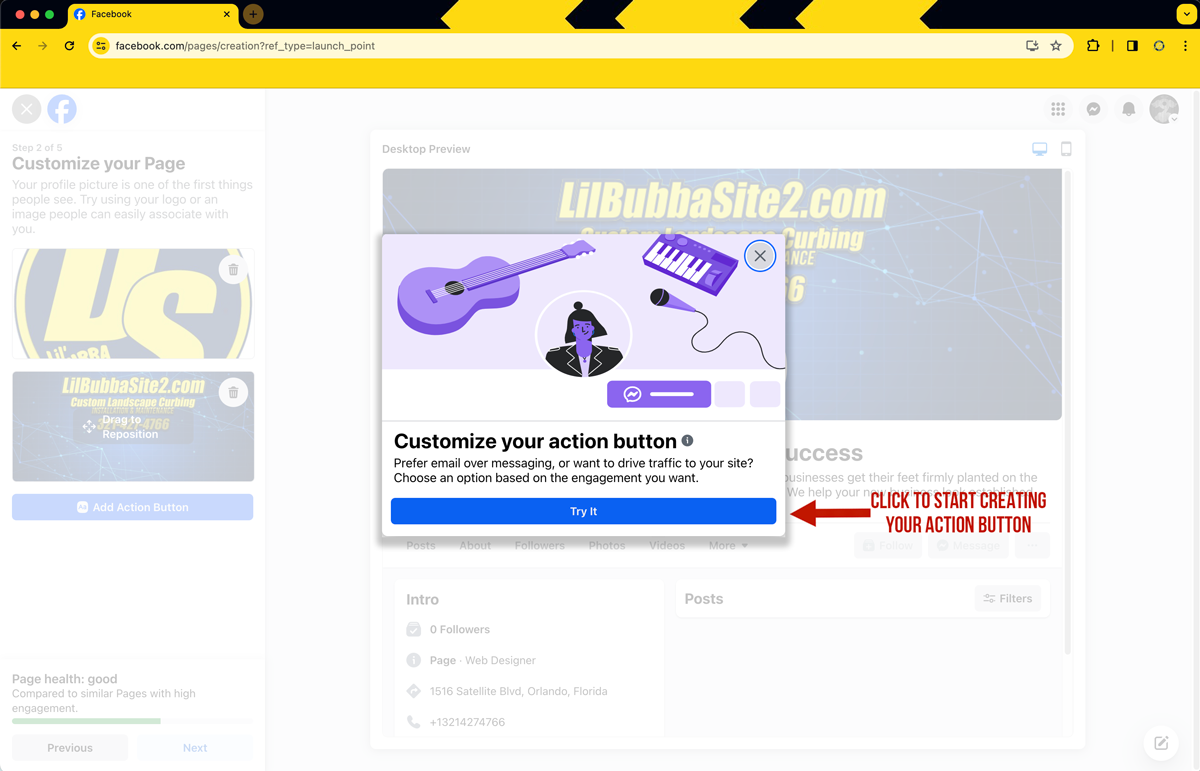
After clicking the Add Action Button you will see another pop-up window appear, click the Try it button to begin
(Image 10)
(Image 10)
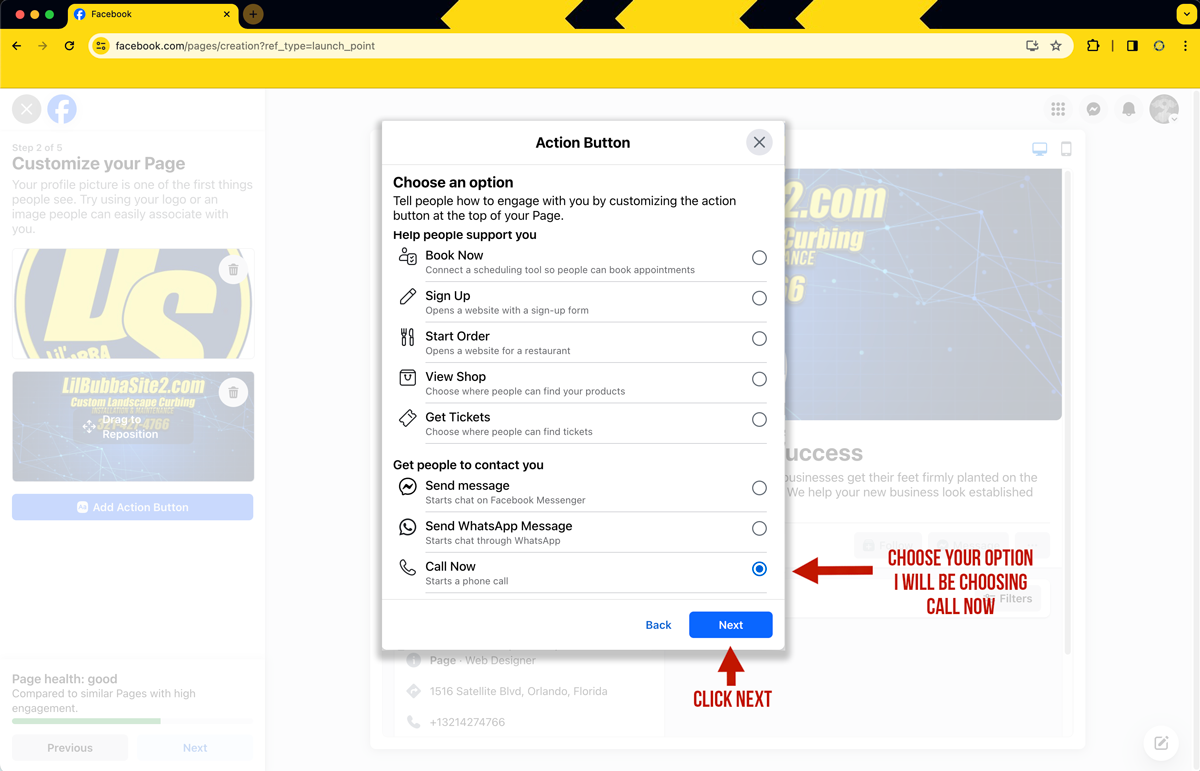
Another pop-up window will replace the previous pop-up. Here you will see many options you can use for the Action Button. For this tutorial, I will be using the Call Now which gives potential clients the easy access to call directly from the Facebook Page. After making your selection, click the Next button to move forward
(Image 11).
(Image 11)
(Image 12)
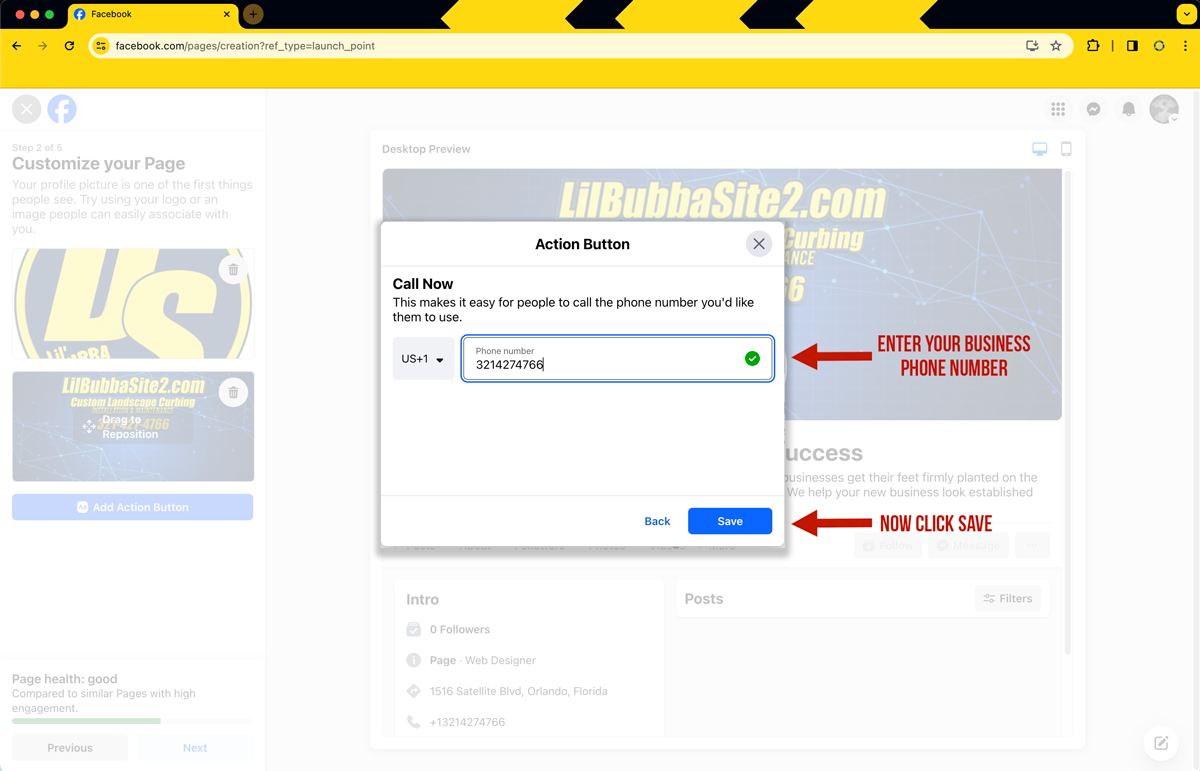
If you chose the Call Now option then simply enter the phone number for your business and click the Save button.
(Image 12).
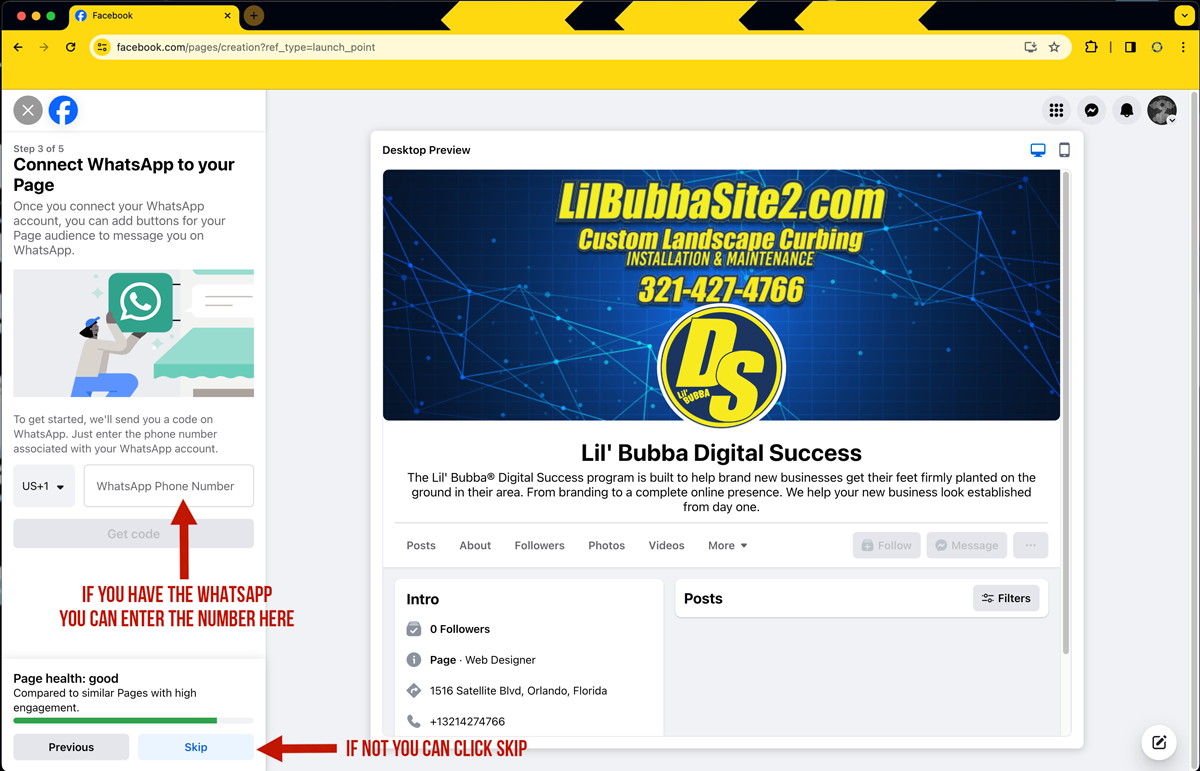
(Image 13)
If you have the WhatsApp
and plan to use it with your business you can enter the phone number associated with your account here. If not, you can simpley skip this portion and click the Skip button on the bottom of the left hand column
(Image 13).
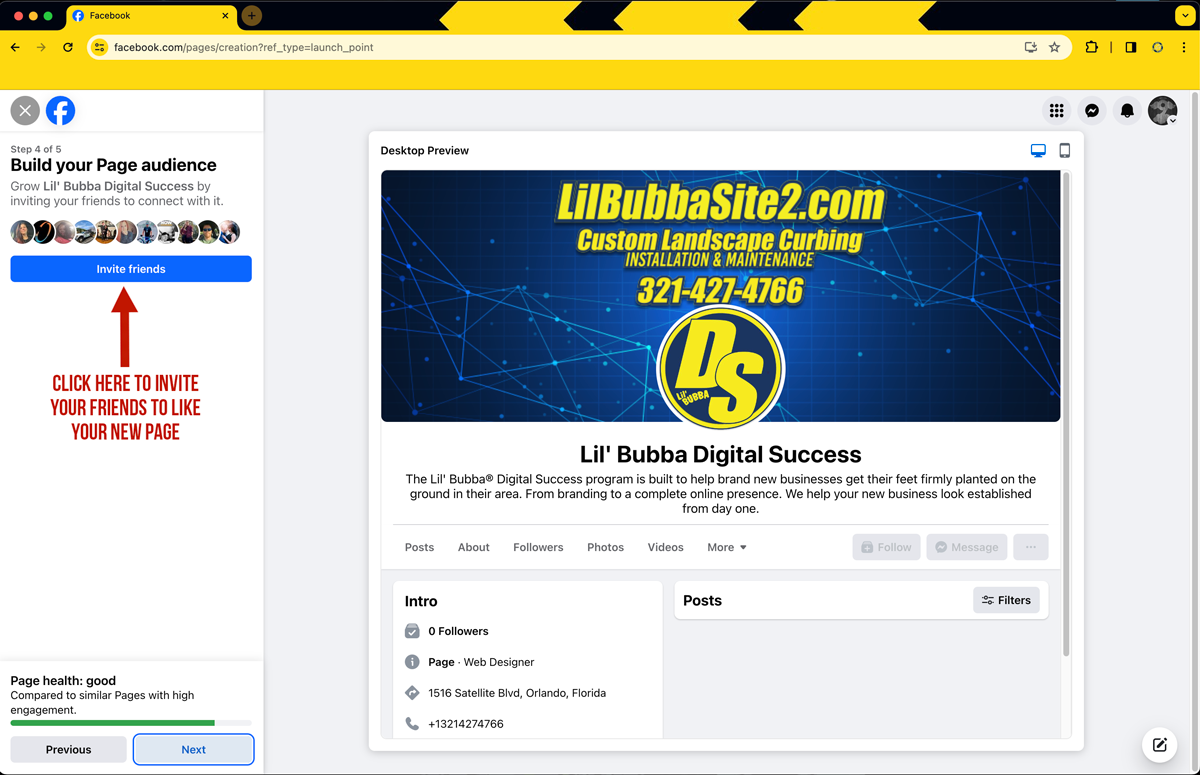
(Image 14)
Now, you can send invites to all your friends to request them to “Like” your page. Click the blue Invite friends button to get started, if you do not want to do this now, you can send invites at a later date. To skip this step click the Next button on the bottom of the left column
(Image 14).
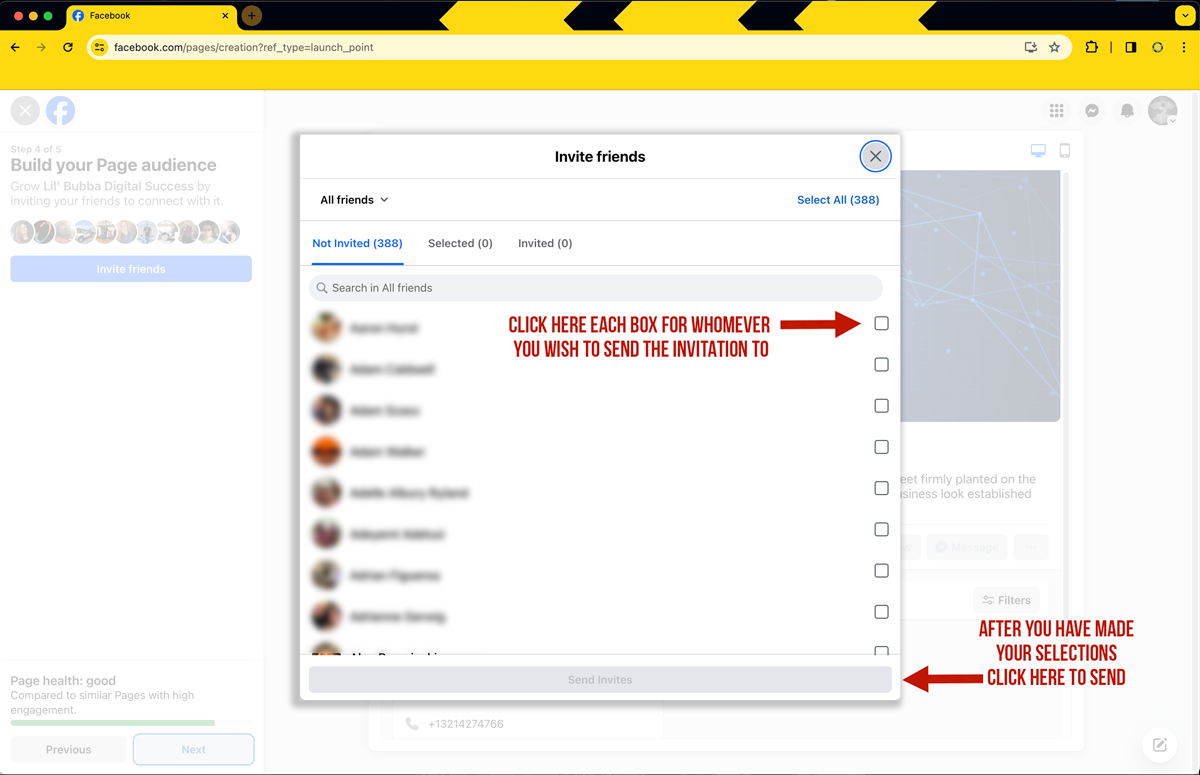
(Image 15)
Another pop-up will appear with a list of all your Facebook friends. You can select as many as you like to send the invitation out all at once. After making your selections, click the Send invites button to send all your requests out
(Image 15).
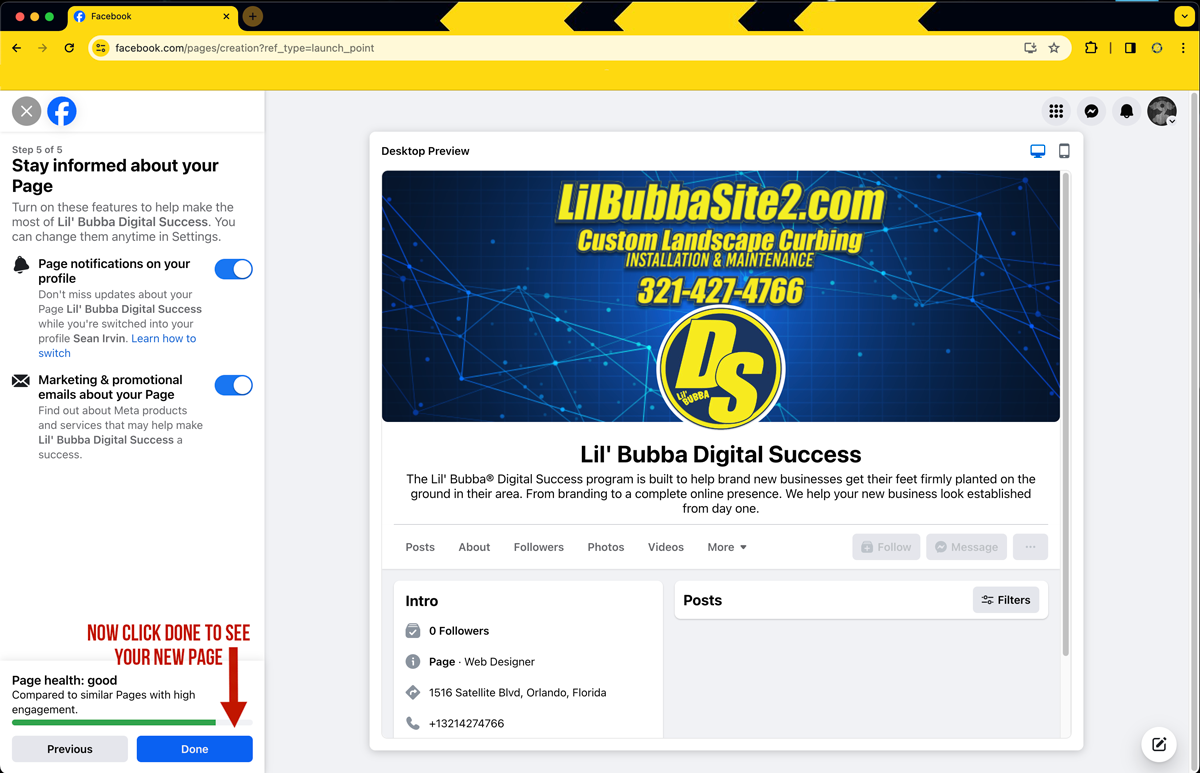
(Image 16)
You have now effectively created your Facebook Business Page, to make it live, click the Done at the bottom of the screen and you will be taken to your new Facebook Business Page.