Changing Your Facebook "Username"
Your Facebook “Username” should be considered part of your business’s branding. When people want to find your business on Facebook, having a customized username/address can be the difference of winning the client or losing them to the frustration of searching with no solid results.
You will notice that upon creating your new Facebook Business Page, that you are initially given a long, nondescript address with the word “profile.php?” followed by a stream of numbers. This is the address to your page, but we can change that to something that suits our business much better.
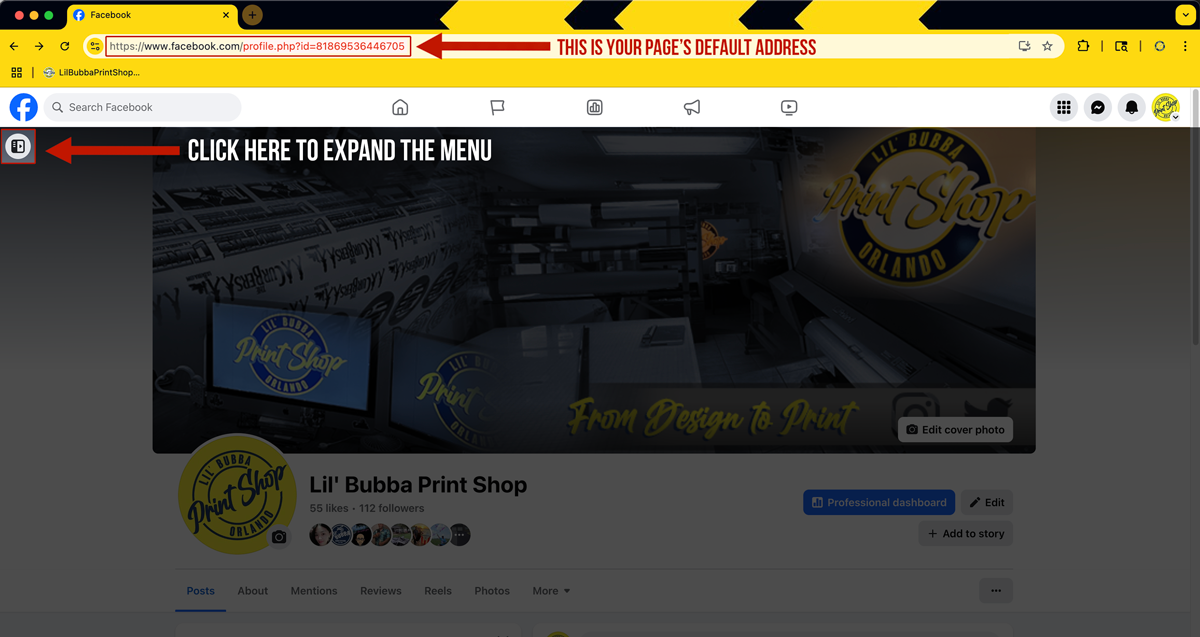
First, we want to go to the homepage of our Facebook Business page. Once there you will look to find the “expand” menu button, located in the top left corner of the window, to access the options available . (Image 1).
(Image 1)
If the menu is already open, then you can skip to step 2 in this tutorial. This menu contains other options you may want to explore at a later date as there are many tools available to you as the owner of the page.
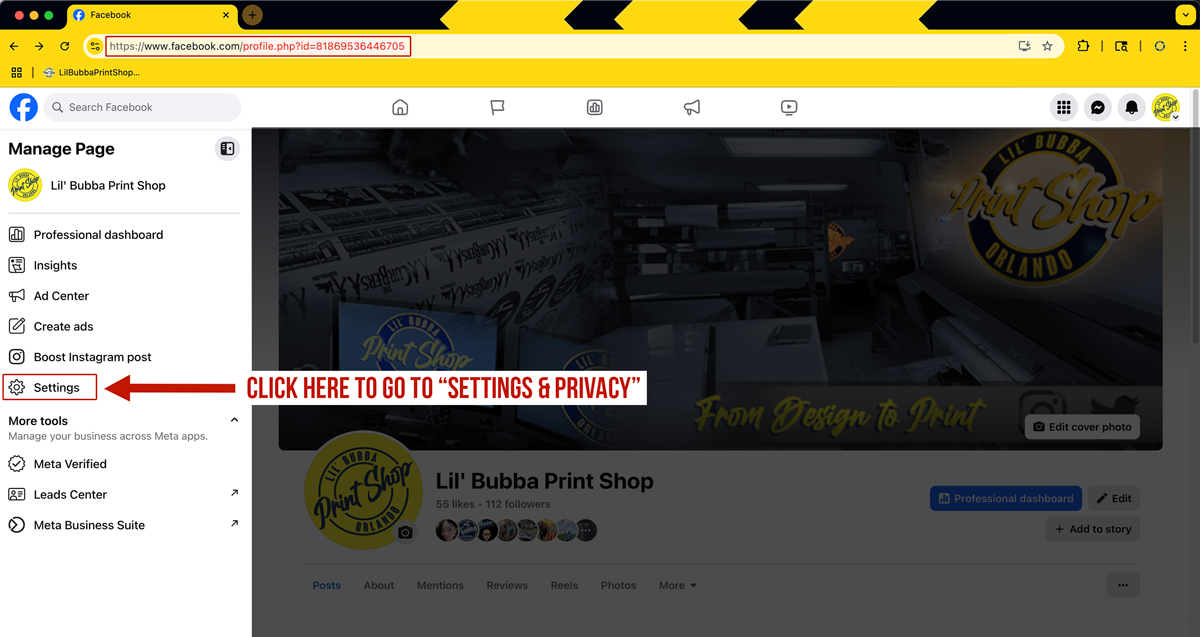
Once the menu has expanded out, locate the Settings tab and click to be taken to the Settings & Privacy menu for your Business page account. (Image 2). These options are only available to people with Administrator access. If you are not able to access this menu, then you must request access from the original page owner.
(Image 2)
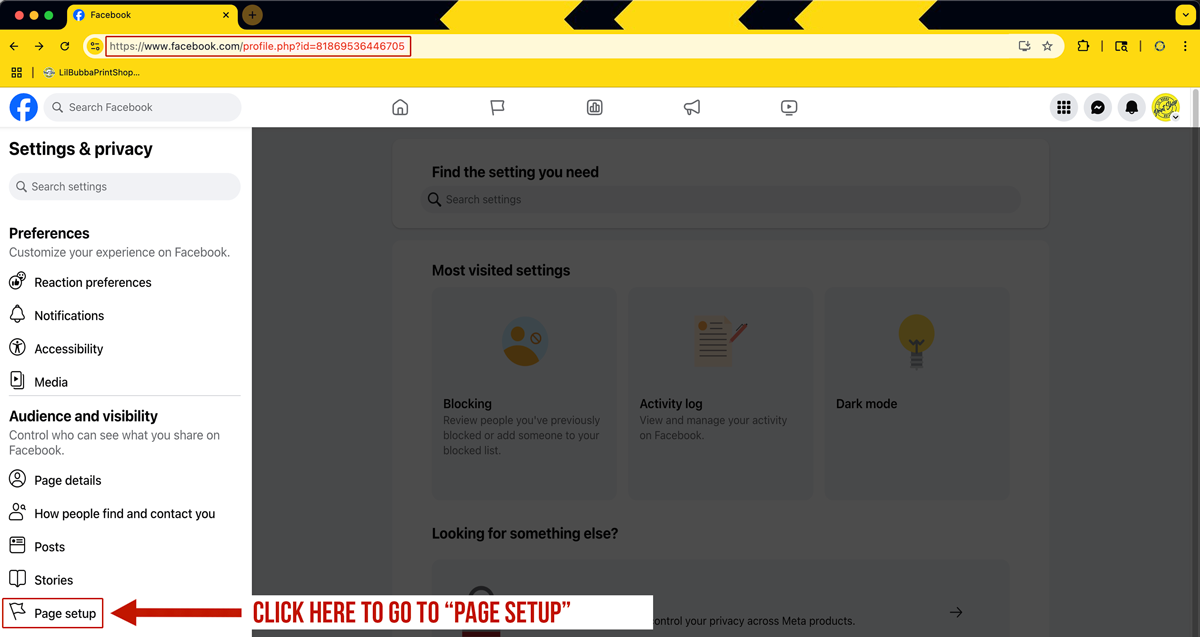
After clicking “settings” your screen will refresh and load the Settings & Privacy menu. Simply scroll down the menu located on the left of the screen until you find Page Setup, click the Page Setup link to be taken to the business page setup options (Image 3).
(Image 3)
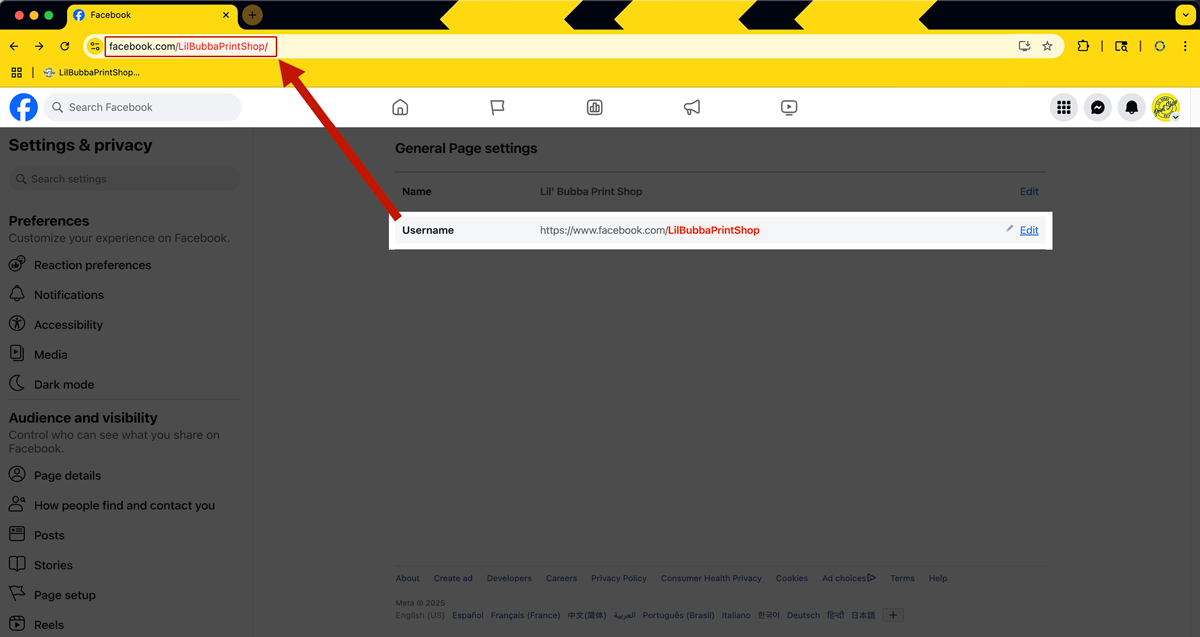
The Page Setup menu contains several options and suggestions for business owners to utilize their page in more efficient ways. This menu also contains the Page Access tab where you can add and remove users to your business page. For our purposes today, we are focusing on the Name tab located at the top of the menu. Please click the arrow to gain access to the naming portion of your page. (Image 4).
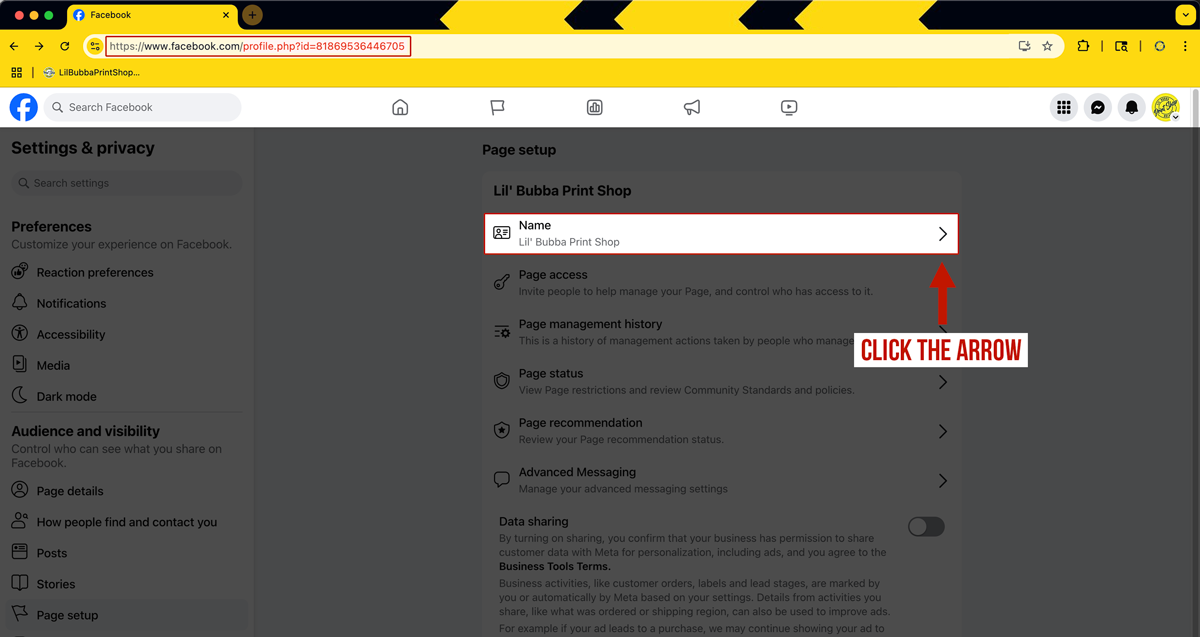
(Image 4)
After the screen loads you will see two options available:
- (1) Name: the name that appears on your business’ homepage.
- (2) Username: the name/address of your business page.
You can edit either of these to your preferences but for this tutorial we are only focusing on the Username. Please click the Edit link to load the edit window and make your necessary changes. (Image 5).
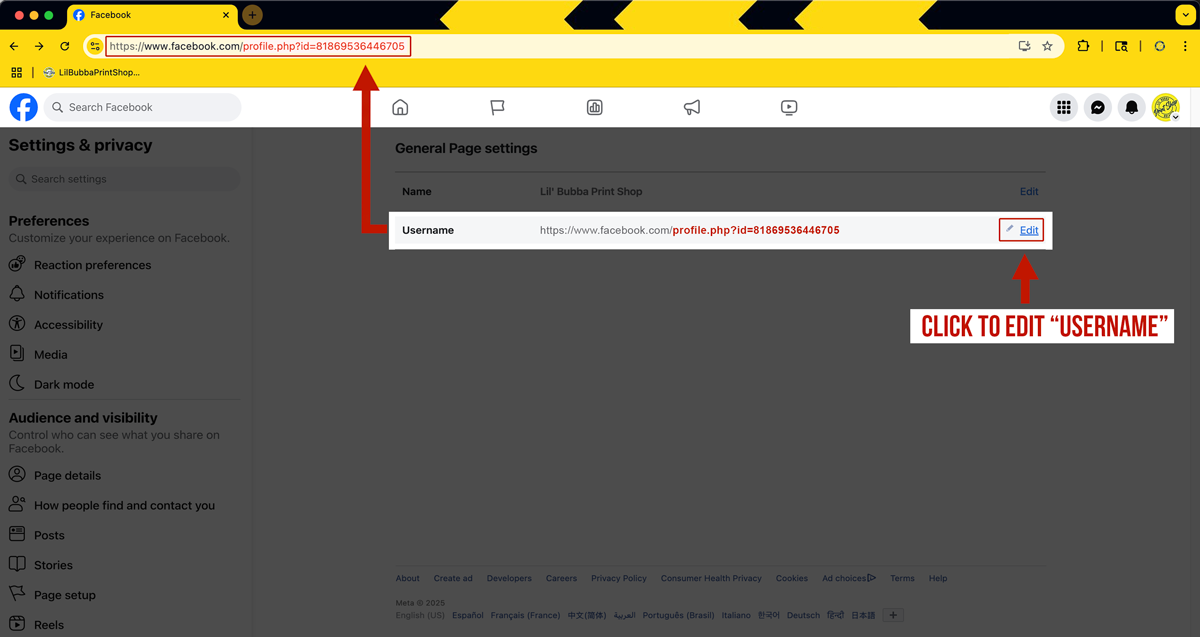
(Image 5)
After the screen loads you can simply type the desired name for your page in the Username textarea. Pay attention to spelling and remember, no spaces or special characters. Only letters and/or numbers can go in this location
Please Note*** Your “Public Username” is the same as your “Timeline Address.”
After you have typed your new name and checked the spelling, click Save Changes to make your edits permanent and live on your page (Image 6).
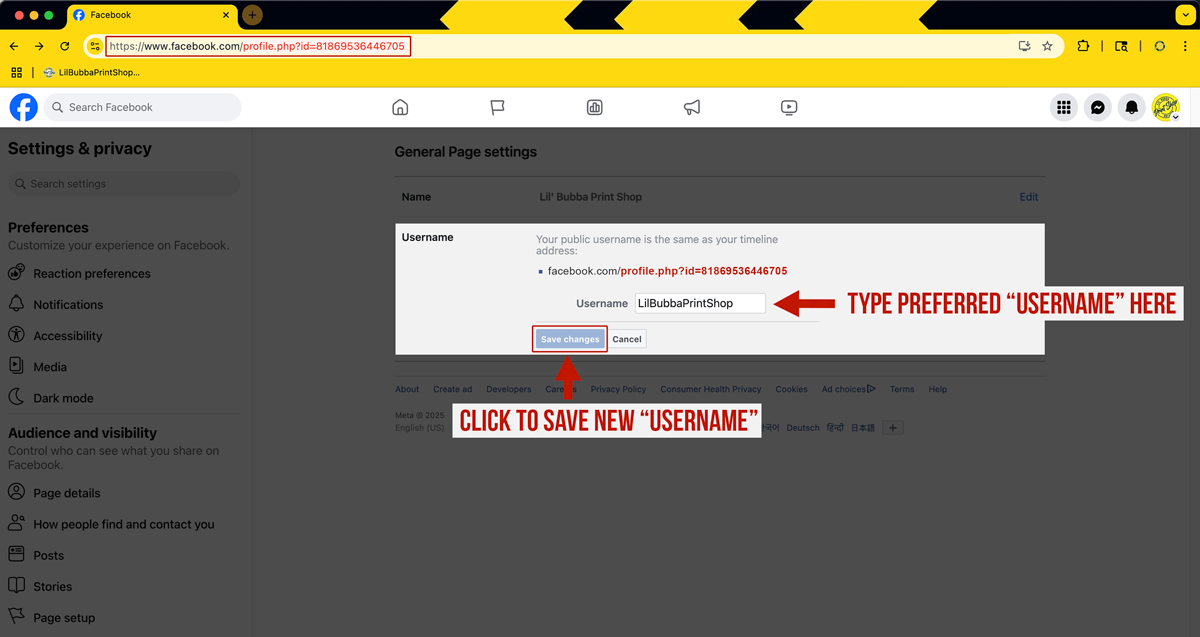
(Image 6)
Your new business page Username & Address should have taken immediate effect. If the address has not updated after you clicked save, no need to worry, just refresh the page and you should see the results (Image 7). Now your business page address should read clean and concise for your business. Be sure to update any links that you may have shared previously to your address change.